Film Slate & Ticket Stubs Studio Titles
I will now be adding some titles onto the trailer. These titles will be displaying the film companies which I have created and were placed on my DVD Label. Within my Storyboard I have stated that I wanted these to be on pieces of paper and for them to dissolve on the screen.
[image]
So to start the title, I went to Title> New Title > Default Still... This bring up a menu. This menu allows you change items such as the width height of the title, frames per second and pixel Aspect Ratio. I will not be changing any of these settings, however, I will be changing the name of the title to 'Film Slate Studios'.
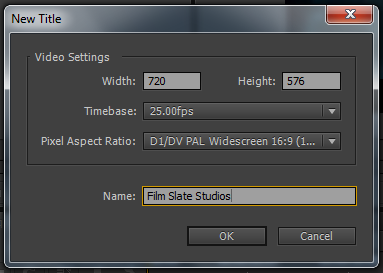 |
| New Title Menu |
Another menu will open, here is where I am able to create the title for the companies. So to begin I am going to be adding the background. As mentioned above I was planning to have these companies displayed on a piece of like paper. To do this I Right Clicked > Graphic > Insert Graphic. This then brought a menu up where I was able to find the graphic I wanted for the background on the system. I used the old paper piece which I used for the both the DVD inlay and the DVD label. I used this because it was already there, but also I thought it would be good to match it all. So, when the graphic was added, I then resized it so that it fitted the title guides and that the waved outlines were no within the guides because I did not want them within the guide.
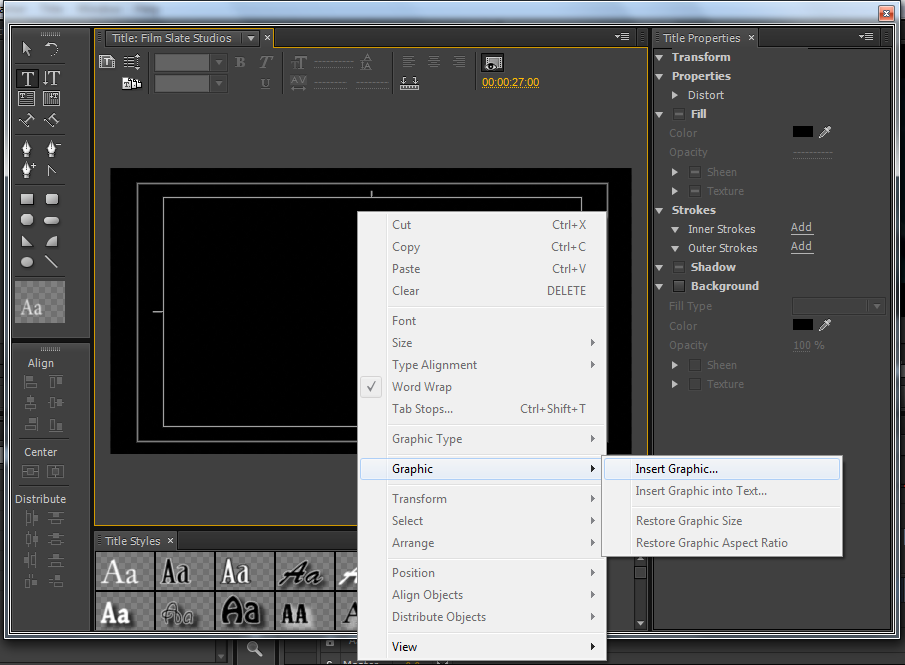 |
| Adding a Graphic to the Title |
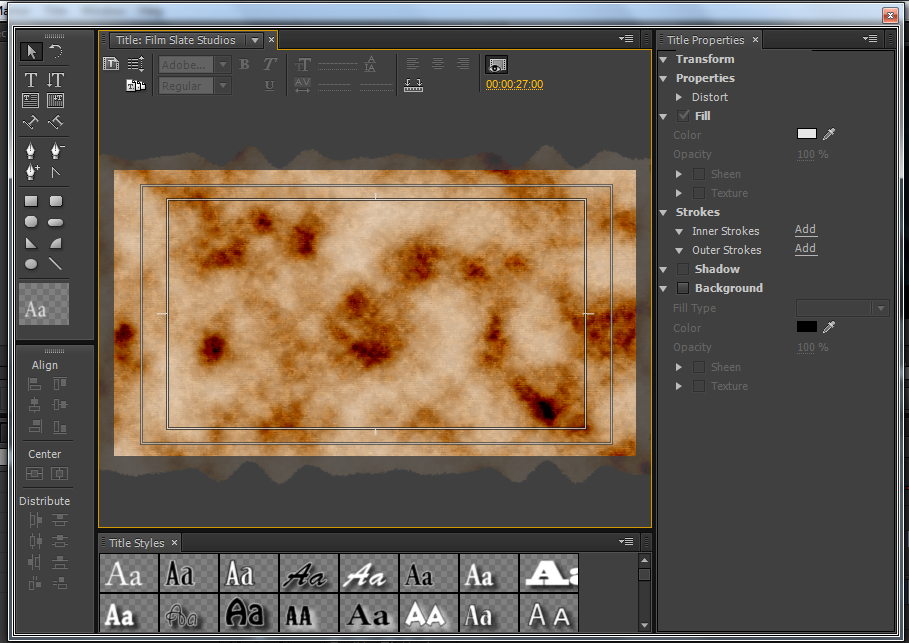 |
| The Old Paper Graphic Resized to fit screen |
I then added some text to the title by using the Text Tool. (this icon looks like a Capital T). I selected the tool and then clicked on the title this then displayed a text line ready for me to type. So, I then typed the words 'Film Slate Studios'. I then highlighted the text and changed the font to 'MoolBoran' I choose this font because it was the same font that was used on the company logo. So I though that it would look quite effective. I then used the Selection Tool to reposition the text.
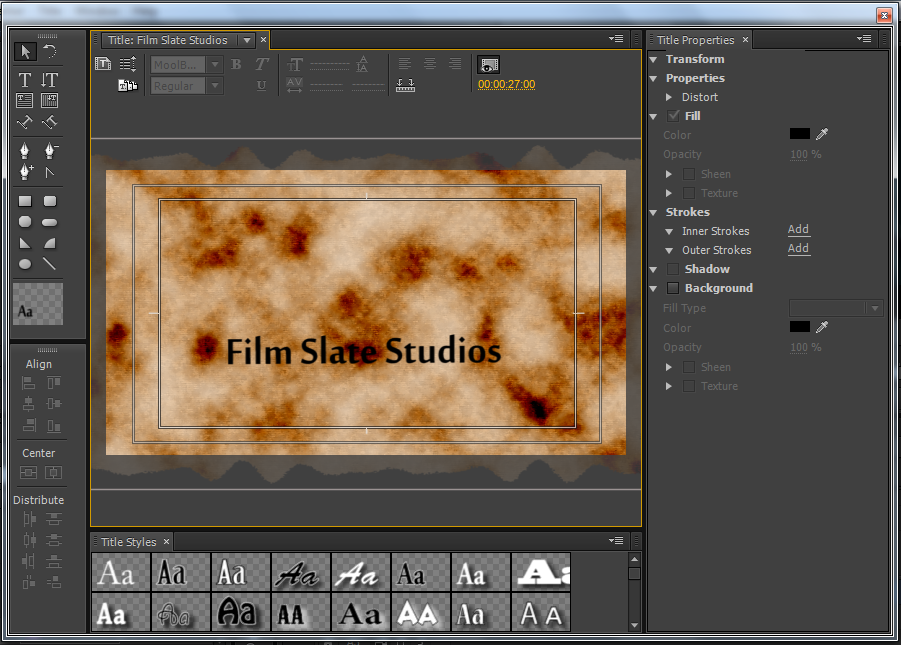 |
| Using the Selection Tool to Reposition Text |
I was not sure whether I wanted to add the actual logo along with it. I am not sure whether it would be suitable at this time. I then remembered, what most movie trailers do and use the logo at the end of the trailer to represent the production companies, actors and when the film is coming out. So, I then closed the title menu when I was finished by clicking the cross in the corner. Then I added the title to the timeline by dragging it from the project tab to the end of the falling clip.
When I dragged it to the end of the falling clip I noticed that it was a little too long. It lasts about 5-6seconds and that is a long time for a title, also I wanted to add another one. So, I thought that I will cut the clip down to about 2-3 seconds. This will give it enough time to be on screen but not taking over the trailer. To do this I placed the curser half way through the clip and then used the Razor Tool and cut the clip into two. I then deleted the other half of the clip, as I did not require it.
 |
| Using the Razor Tool to cut the Clip |
 |
| Deleted the second cut part of the Clip |
I then repeated the same process for the next title clip. But this time I used the title 'Ticket Stubs Studios' instead. Once I created the last title I then watched the video back. I have also noticed when
I replayed the trailer back that I found that the titles were too long,
so I went back and cut them shorter. This worked out a lot better
because they were not so long winded and not taking up as much time, then allowing me to added more clips.
 |
| Final Cut Titles |
Tools I have used in this post:
- Title
- Adding Graphic
- Text Tool
- Selection Tool
- Razor Tool


No comments:
Post a Comment