Wednesday, 30 April 2014

Premiere Progression Blog Post 23

Birds Clip

I will now be adding a new clip to the trailer. This clip will go after the Shield Slam Clip. This clip is based on the witch in another form, i.e. in the form of several birds and they are coming back, so the witch can take her true form. I thought this was quite effective after the shield slam clip. I am not really sure why I chose this clip for after this clip. I think I just quite liked the way the bird got through the hole in the roof and then fall into a whole where the witch would emerge. I will be taking this bird clip from VTS_08_3_x264.
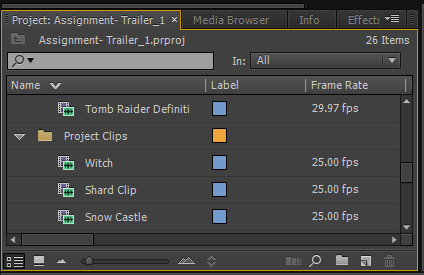
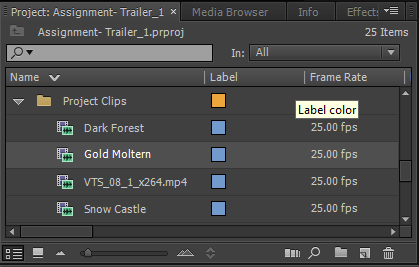
I made sure that the source tab was on in the viewing panel and dragged the walk-through to the viewing panel. I then used the In and Out Tool to make a mark at 00:24:09:13 and 00:24:15:02. This clip is where shards of glass fall onto the floor. I then dragged the clip down into the Project Clips Bin and renamed it 'Birds'.

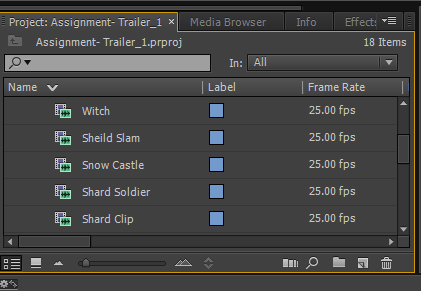
Birds Clip within the Project Clips Bin
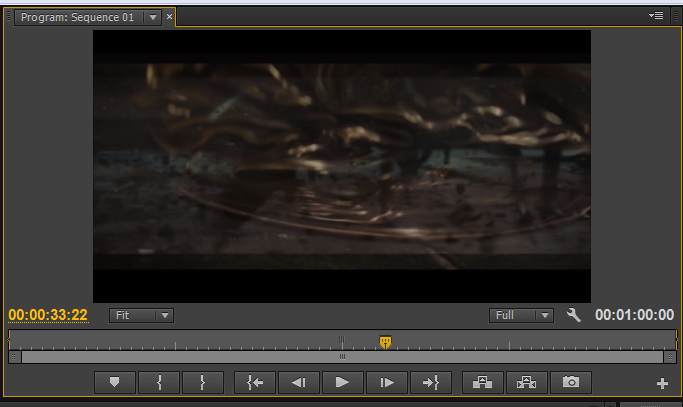
I then dragged the clip to the timeline at the end of the end of the music . The only problem with the clip was the writing on the clip which needed to be removed. Apart from that I felt that this clip followed the character jumping clip really well.
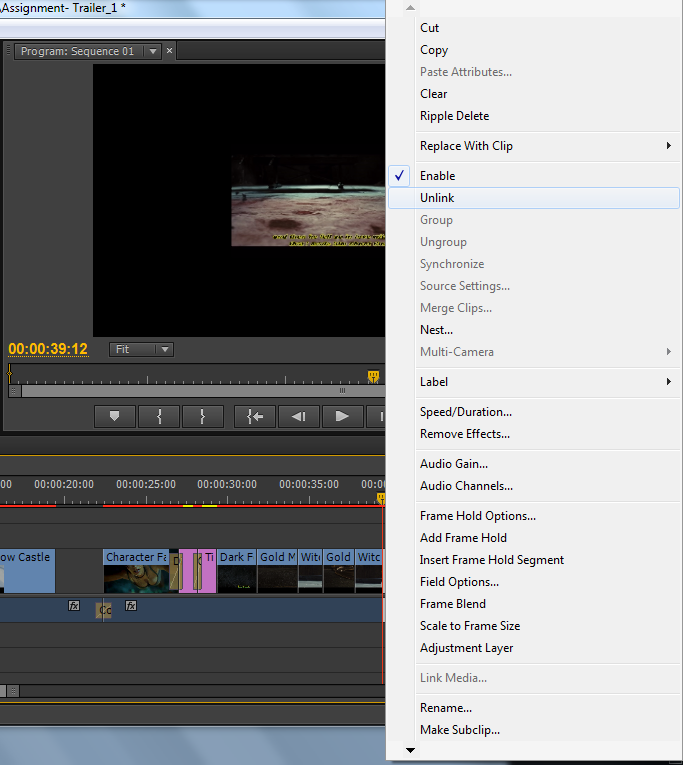
So, I started by separating the video and the audio, however, this time I kept the audio. I did this by right clicking on the clip on the timeline and went to Unlink. I then selected the audio and deleted it because I did not want the audio as I was going to be using different audio music for it.

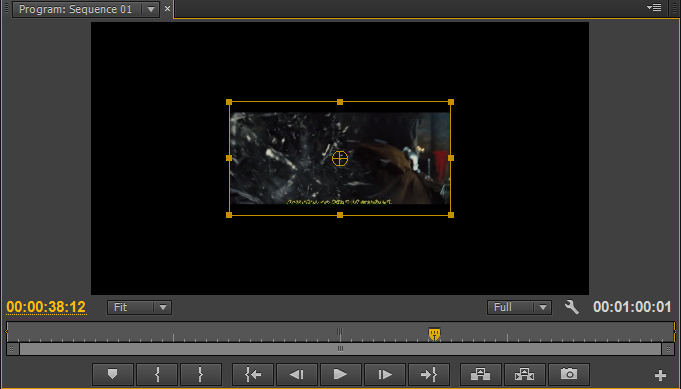
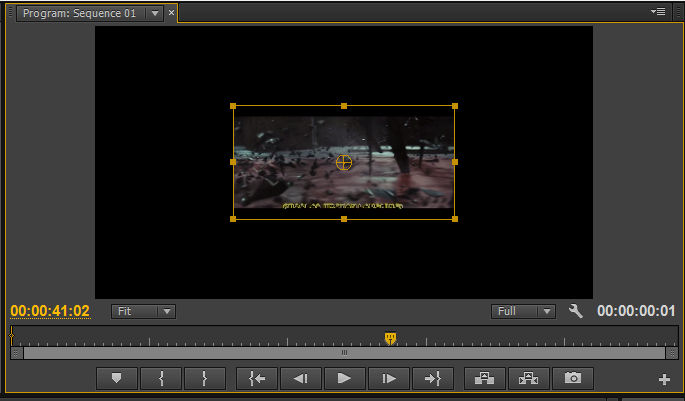
I then moved onto to resizing the clip. I did this by double clicking on the clip in the clip view panel (right hand side viewing panel) till an orange lining around the clips and had little squares which I used to resize the clip. I resized the clip that the edges of the clip were touching the overall fit of the trailer. 
Clip in resize mode
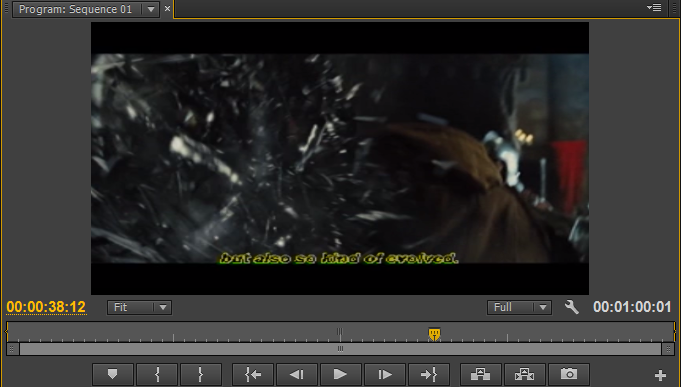
Clip Resized


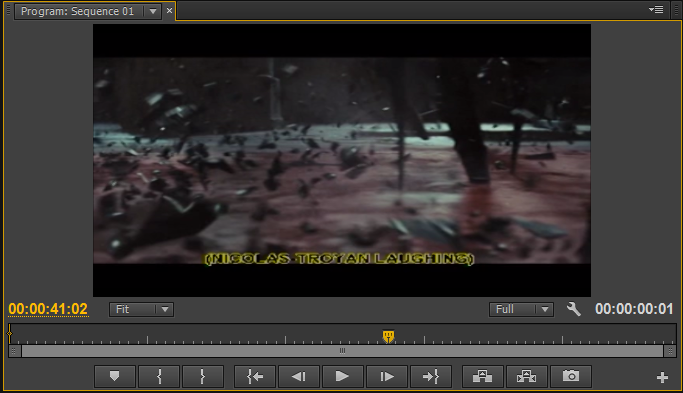
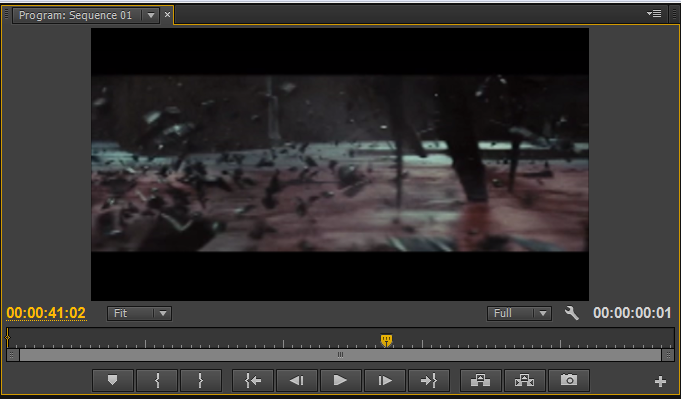
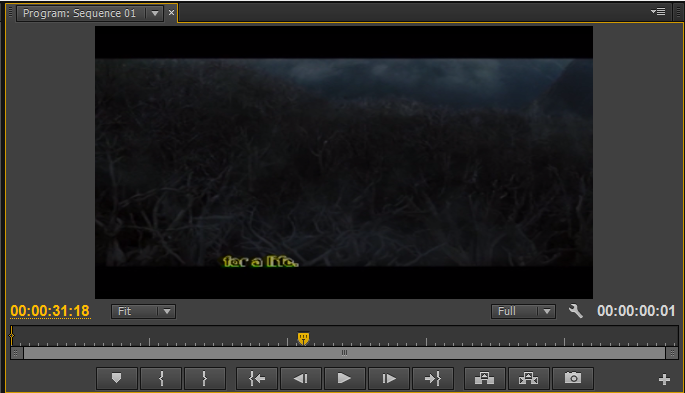
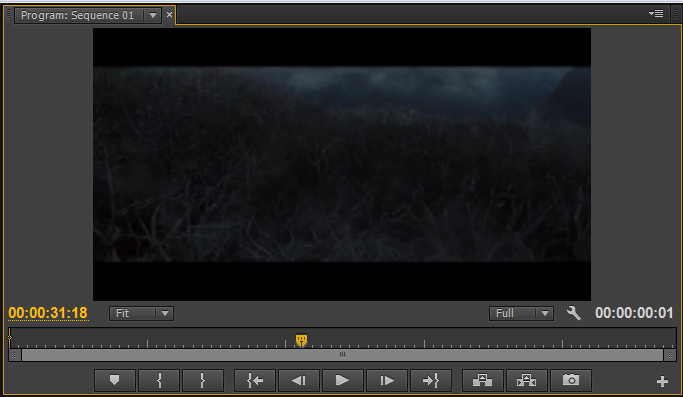
 I then went and cropped the clip. I did this by going to the Effects panel tab in the same section as the project bins and then went to Video Effects > Transform > Crop. I then went into the Effects Control panel to the crop settings. I then set the crop percentage for the bottom only because there is text on the clip which I do not want to be viewed in the trailer. So, I set the percentage for the bottom crop at 15%. This was enough to crop the writing and enough that it did not take up much of the clip up either. I then repositioned the clip so that the two black lines on the clip were even at both the top and the bottom of the clip.
Video Effect: Transform: Crop. Crop Settings for this clip

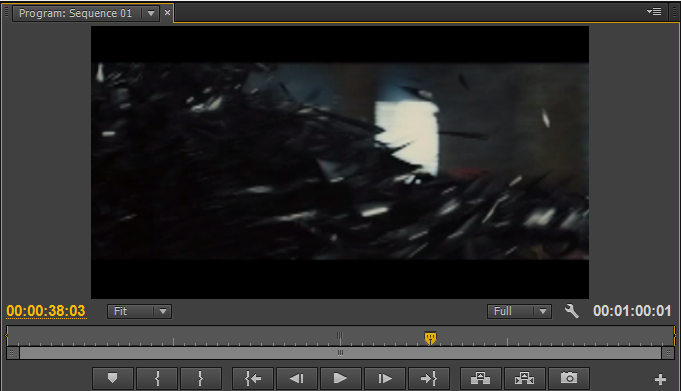
Repositioned

I found when I played this clip back was that it was really long, so I then cut the clip using the Razor Tool. I did it so that the only part of the clip that was playing was the bird falling in from the hole in the roof and tot he point where there was a few birds scattered around. 

I then decided to change the brightness of the clip. This was because I felt that the clip a bit to dark for my linking. I know the lighting should be a bit dark because the scene is in the castle where there are not many windows and has a dark atmosphere to it. But I thought brightening it up might bring a bit more light to clip where certain parts are really dark. I did this by going to the Effects Panel located in the same area where the project clips are kept. I then went to Video Effects > ... > Brightens and Contrast. I then went to the Effects Control panel where I was able to adjust the brightness. I changed the brightness to about 5%. This made the clip brighter, but that much that it lost the darkness in certain places, which I felt made the clip look a little better.
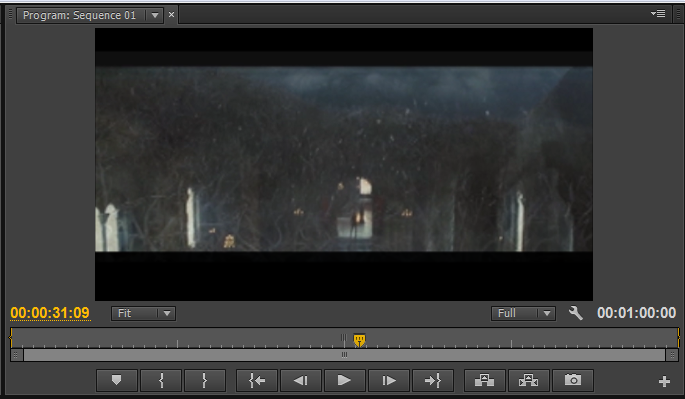
Video Effects: ... : Brightness and Contrast. Settings for the clip.

Tools I have used in this post:
  • In and Out tool
  • Unlink
  • Resize
  • Crop
  • Razor Tool 
  • Brightness

Premiere Progression Blog Post 22

Shield Slam Clip

I will now be adding a new clip to the trailer. This clip will go after the old ending clip Character Jumping. This clips will be based on a soldier trying to destroy a demon made out of glass shard with their shield. This clip will be good to be added because it added the more action which I wanted for the trailer. But also, I liked the effects which was already there when the man smashed himself with his shield into the demon and the way the shards went everywhere. I will be taking this glass/shard clip from VTS_08_4_x264.
I made sure that the source tab was on in the viewing panel and dragged the walk-through to the viewing panel. I then used the In and Out Tool to make a mark at 00:08:09:01 and 00:08:12:00. This clip is where shards of glass fall onto the floor. I then dragged the clip down into the Project Clips Bin and renamed it 'Shield Slam'.
Shield Slam clip added to the Project Clips Bin
I then dragged the clip to the timeline at the end of the end of the character jumping clip. The only problem with the clip was the writing on the clip which needed to be removed. Apart from that I felt that this clip followed the character jumping clip really well.
 
So, I started by separating the video and the audio, however, this time I kept the audio. I did this by right clicking on the clip on the timeline and went to Unlink. I then selected the audio and deleted it because I did not want the audio as I was going to be using different audio music for it.

Shield Slam clip unlinked, audio deleted and put into place.
I then moved onto to resizing the clip. I did this by double clicking on the clip in the clip view panel (right hand side viewing panel) till an orange lining around the clips and had little squares which I used to resize the clip. I resized the clip that the edges of the clip were touching the overall fit of the trailer. 
Clip in Resize Mode
Clip Resized
I then went and cropped the clip. I did this by going to the Effects panel tab in the same section as the project bins and then went to Video Effects > Transform > Crop. I then went into the Effects Control panel to the crop settings. I then set the crop percentage for the bottom only because there is text on the clip which I do not want to be viewed in the trailer. So, I set the percentage for the bottom crop at 15%. This was enough to crop the writing and enough that it did not take up much of the clip up either. I then repositioned the clip so that the two black lines on the clip were even at both the top and the bottom of the clip.

Transform Effect: Crop. Crop settings for the clip.
Clip Repositioned
 I did not need to cut this clip shorted because it was a good enough size already as it does not take over the trailer. When it comes to effects I am not sure what I want to do with it. What I am planning to do is that I am going to find all the clips which I want and then see what effects I could add to the clips.

Tools Used in this post:
  • In and Out Tool
  • Unlink
  • Resize
  • Crop

Premiere Progression Blog Post 21

Changed Ending

After placing the Shield Slam clip onto the timeline, I was trying to find out what what clip I could use after. I then thought about the original ending which I was going to be the next clip after. So, I moved the clip after the shield slam clip and played it back. It did not not look at all right. I then thought about having the clip before the shield slam clip, but cut off the part where the character is about to jump; so they are left running. I thought this would look effective because it will make the character look like they are doing a running up and then smashing a shard demon, even thought it is not the same person. So, I then swapped the clips played it back and was happy with it as it looked really effective so I kept the order as it was.
Character Jumping Clip moved from the end to the next clip after Gold Molten

Tuesday, 29 April 2014

Premiere Progression Blog Post 20

New Titles

At this point I have looked at my titles and felt that this was what was holding my trailer back. This is because they looked really tacky again the clips, especially with the paper background. Also, I also read in the assignment that the titles need to be on the clip. So, I tried and experimented with the titles on a clip. 

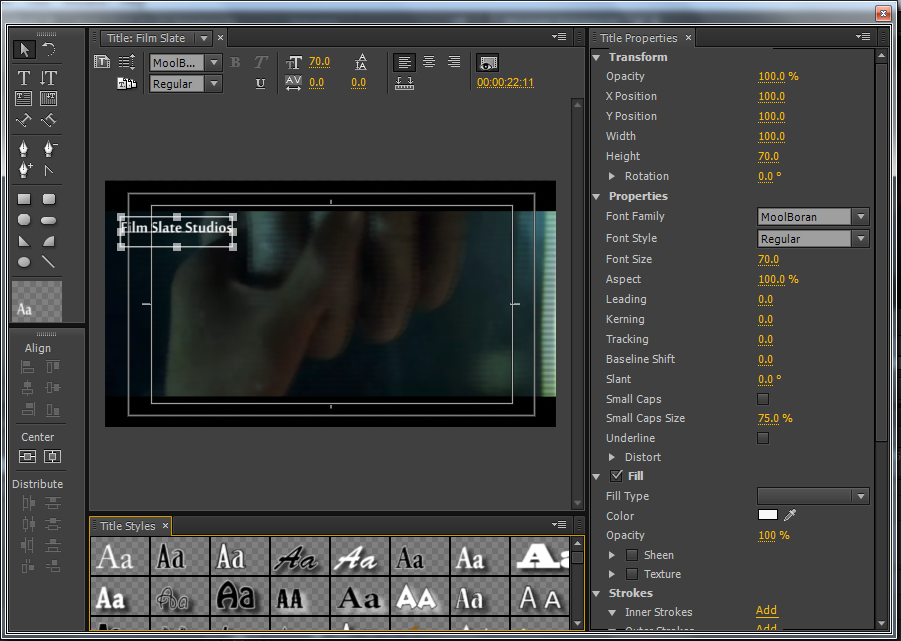
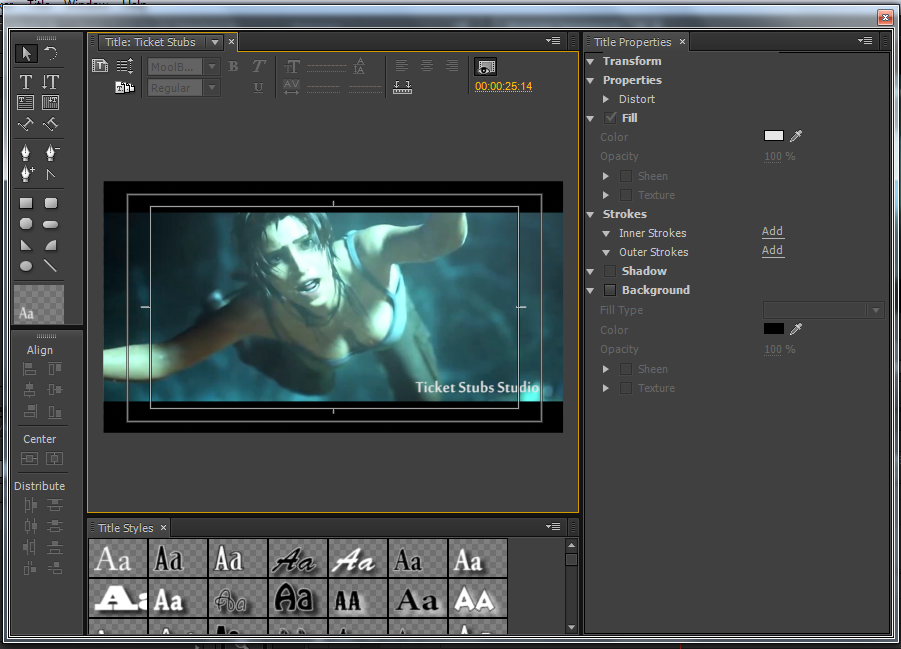
So, I started by deleted the titles I originally had and started again. Once I deleted the title I then decided to use the character falling video and fill in the gaps, but also use this clip to have the titles on. So, I moved the character falling clip next to the dark forest clip and stretched it out till it was where it was before. I then went to Title > New Title > Default Still... making sure that the curser is over the clip. So I can see where I want the title to be on the clip. I then used the Text Tool and then typed the word 'Film Slate Studio'. I then changed the font to 'Moonlean' and the font size to 50. I changed the font to fifty because I felt that it was big enough that you can see the writing but not too bight that it takes over the clip. I then repositioned the text so that it was in the top left hand corner of the clip. I then exited the title. I did this again for 'Ticket Stubs Studios' and repositioned it in the bottom right corner instead. 

I then moved the titles from the project tab on to the timeline in video two above the character falling video. As mentioned above I wanted the titles to be played over this title. I tried to do this by making sure the titles were the same size, but left a bit of the normal falling clip either side. I then watched it back and was happy with the results and felt that it loads better and more professional than the paper background. I watched it back and found that I needed to add a transition between the two titles.

New Film State Title
New Ticket Stubs Title
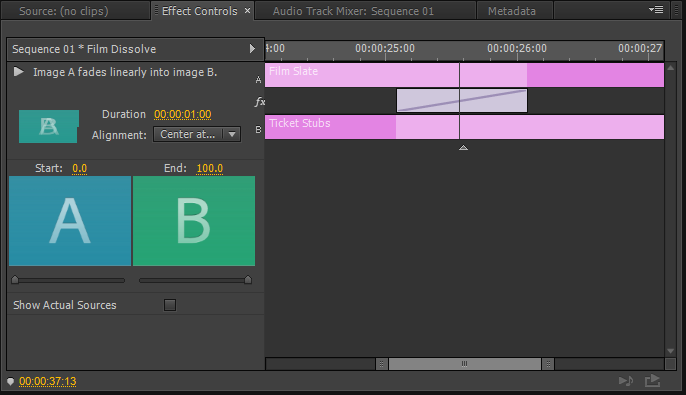
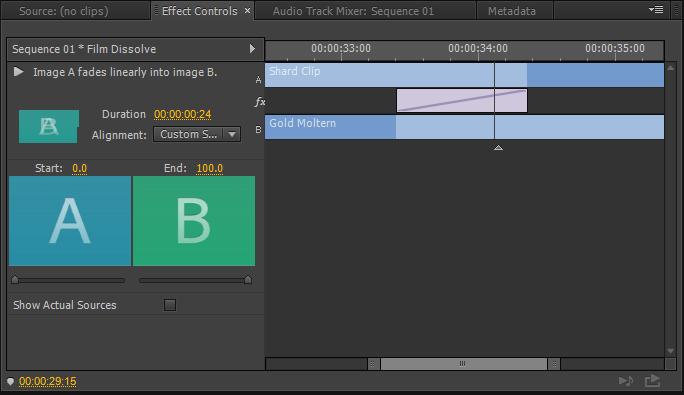
 Now to add the transition. The transition which I choose for this was the Film Dissolve. I choose this one because I felt that that titles needed something that would gradually go from one title to another. I think this was because I did not want it to look tacky on top of the clip. I kept the transition in the centre of the two titles because they are even size so I thought that even size transition will make it look better and more symmetrical. 
Video Transition: Dissolve: Film Dissolve. Custom Settings.
Transitions - Character Falling and Dark Forest Clip

I kept the same transition which I originally had between the titles and the dark forest clip. This is because I felt that this transition really worked for the dark forest clip. Dipping it into black and then a dark scene appearing really worked well and made it more realistic and more darker.


Transitions - Dark Forest and Shard Clip

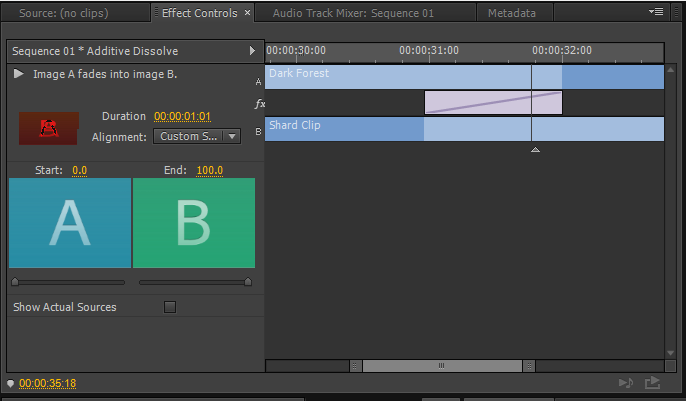
For this transition I have chosen the transition Additive Dissolve. I choose this to other transitions such as Film Dissolve because the shard clip is very faded because of the second clip on top. I felt that the light effect which additive dissolve gives from the transition really worked from the clearer clip to a clip which is faded. I felt that it made the clip look more blended and trailer look more consistent. I made the transition be more into the dark forest clip then the shard clip because I felt the transition needed to start well before the faded clip came into place, to keep that consistent and blended look I was after.
Video Transitions: Dissolve: Additive Dissolve. Custom Settings
Additive Dissolve Transition

Premiere Progression Blog Post 19

Shard and Gold Molten Clip Effect

At the moment I have the gold and shard clips one after another. However, I felt that the clips this way I felt that it was a bit tacky, even thought I liked the idea. So, I experimented with the clips because I still wanted them but I wanted to try and do something different with them. This is when I found a way to make the clips look effective and still keep the clips. 

What I did was that I made the first golden clip play on top of the shard clip. I did this by placing the first gold molten clip in the video two section above the shard clip which was moved next to the dark forest clip. This meant then that the gold molten video would play with the shard clip. However, when played back the gold molten clip will only play.
Gold Molten Clip on top of the Shard Clip
So, I had to make a few changes to the clip so that each clip is playing, but you can still see each of the clips playing one on top of another. This main change was to change the Opacity of the clip. To do this I selected the clip and good to the Effects Controls panel, where there was settings already there. I changed the opacity for all three of the clips. 

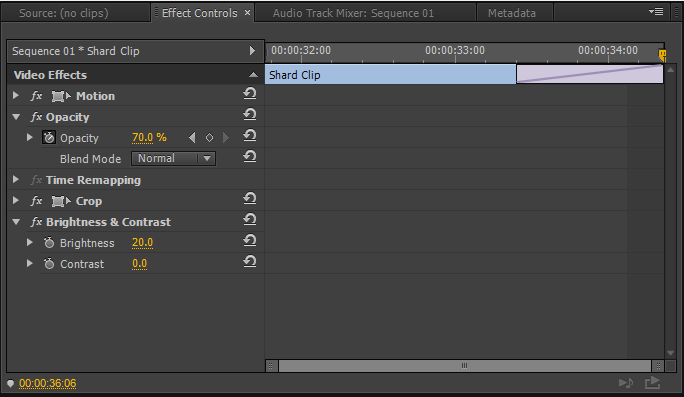
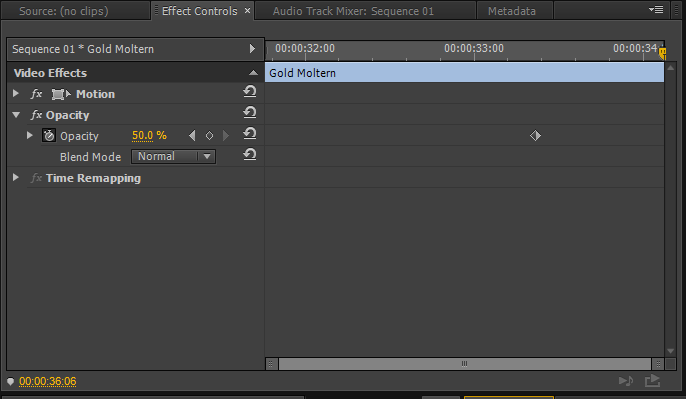
The shard clip I changed the opacity to 70%. I changed it to 70% because I still wanted too see the clip, but I also wanted to see the Gold Molten clip on top of it. I think it will help with the darkness of the gold molten clip. I the changed the opacity of the gold molten clip on top of the shard clip to 50% This is because as mentioned on the previous clip about the darkness of the clip. I did not want the darkness of the gold clip to over power the two clips when they play on top of one another, especially to the fact that I brightened the shard clip earlier.

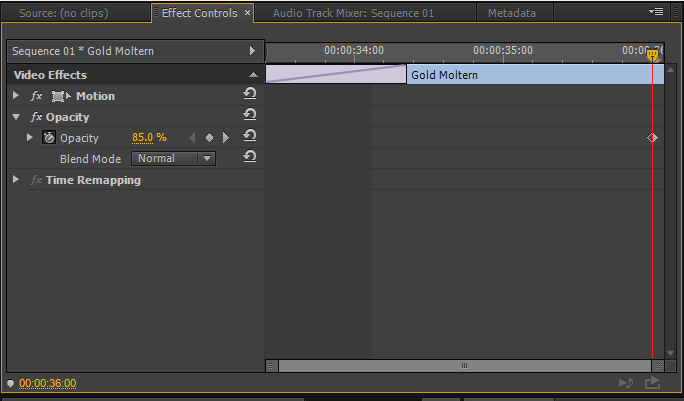
I then changed the opacity of the second gold clip. I did this because the first gold clip was made less clear. So, I only thought that I would not make the second clip as clear as well to try and blend it in a bit more. I also found when I changed the percentage to 85% was that it brightened the clip a little which I thought made the clip look better and also blended in well.
Opacity Settings for the Shard Clip
Opacity Settings for the second Gold Molten Clip
Opacity Settings for the Gold Molten Clip on top of the Shard Clip
 Transition

Now I have the effect into place I then wanted to add a transition in between the shard and the second gold molten clip. I watched this part back and found that it was not very constant when played back. So, I thought that adding a transition would help keep it consistent. The transition which I choose for this was Film Dissolve. I choose this one over the other dissolve effects because I felt that this was more natural and made the more faded clip blend more when changed to the more clear clip than other transitions such as Dip To Black where it would not make constant and add a gap where it was not needed. I also changed the settings of the transitions. I changed it so the transition was more in the shard clip than the gold molten clip because I wanted the two gold molten to be as close as to playing after another as best as I can. This setting was the best I could get it to.
Video Transition: Dissolve: Film Dissolve
Custom Transition Settings for the transition

Monday, 28 April 2014

Premiere Progression Blog Post 18

I realised that within the previous post about the Shard Clip, that I did not mention about the audio. What I did was that I moved the audio for the the actual Shard Clip to Audio Two section on the time line. I did this because I wanted the sound effects which orginally came with the clip to still be there, but I also wanted the music still there in the clip.

There is also a load of other reasons why I did it like I did. Reason One) I did not want to cut the music and place it in different places. One would be because it would end up confusing me and Two it would not be right, because the background music might not fit right when one part of it to another. Reason Two) I felt that this was not nessecary and waste time which I did not really have, but also when I played it back both sounds did not overpower each other; which saved me a job of trying to sort this out.
Shard Audio in Audio Two Section of Timeline
Now I have the next load of clips in place. I watched the whole trailer back to see whether I liked the clips within the order that they were placed in. In this case I didn't. I felt that it did not right wither the two clips one after another and then a brand new clip. So, this is where I have deicded to mix and match the clips in an order I was happy with. If anything I kept the dark forest clip to where it was because I was happy with it there and I thought it was a good starting point after the titles.

After trying different combinations of the clips I have finaly found one which I really like. This is where the first witch clip is removed off the timeline completelty and replaced with the Shard Clip. I found this really effective, especially after the first gold molten clip, also I felt that I was starting to add more action to the trailer which is what I wanted. I moved the audio so that it matched the video as I still wanted to keep the audio and music together.

However, when watching this section back I found that the ending witch clip did not match up or look in place with the new added shard clip. As I mentioned in the Witch Clip post, I was thinking about trying it as an ending clip before the ending title. I think I will give this a try, becuase as I said the clip does not look right with the shard clip in place of the first half of the witch clip. Also, this is an alternative to wasting a clip I found.
Shard Clip Moved 

Sunday, 27 April 2014

Premiere Progression Blog Post 17

Shard Clip 

I will now be adding a new clip to the trailer. This clip will go after the last witch clip. This clips will be based on shards of glass smashing and falling onto the floor. This clip will be good because this clip gives a bit more drama and I feel it gives a bit more action and suspense. I will be taking this glass/shard clip from VTS_08_4_x264.

I made sure that the source tab was on in the viewing panel and dragged the walk-through to the viewing panel. I then used the In and Out Tool to make a mark at 00:11:35:12 and 00:11:41:16. This clip is where shards of glass fall onto the floor. I then dragged the clip down into the Project Clips Bin and renamed it 'Shards'.
Shard Clip in the Project Clips Bin

I then dragged the clip to the timeline at the end of the end of the second witch clip. I played back the whole video to see how it looked. I thought it looked really good and effective for the trailer.  However there were was one main problem to the clip, which was that I had to remove the writing from the video clip and resize it to fit the screen.
 
I started by separating the video and the audio, however, this time I kept the audio. I did this by right clicking on the clip on the timeline and went to Unlink. I kept the audio because I liked the sound effects of the shards smashing and falling onto the floor. Also, I felt that I needed some extra sound effects apart from music for the whole trailer. I know I have the monologue, but it is not enough. 
Shard Clip Unlinked, both video and audio are separated.
I then moved onto to resizing the clip. I did this by double clicking on the clip in the clip view panel (right hand side viewing panel) till an orange lining around the clips and had little squares which I used to resize the clip. I resized the clip that the edges of the clip were touching the overall fit of the trailer. 
Clip in resize mode
Clip Resized
I then went and cropped the clip. I did this by going to the Effects panel tab in the same section as the project bins and then went to Video Effects > Transform > Crop. I then went into the Effects Control panel to the crop settings. I then set the crop percentage for the bottom only because there is text on the clip which I do not want to be viewed in the trailer. So, I set the percentage for the bottom crop at 15%. This was enough to crop the writing and enough that it did not take up much of the clip up either. I then repositioned the clip so that the two black lines on the clip were even at both the top and the bottom of the clip.
Transform Effect: Crop. Crop setting set for the Shard Clip
Clip repositioned
This time I did not need to sort out the clip length, this is because it was at a good length already; personally. It was about the same size as the cut gold molten and witch clips.I am not 100% sure what else I can do to this clip in terms of effects. The clips has the brightness and contrast already on the which worked really well already, meaning that there was no need to improve that side of things. However, I will later when I have decided on the order of these clips I have already done, have a play with other effects and see what else I can do to make this clip my own.

Tools I have used in this post:
  • In and Out Tool
  • Unlinked
  • Resize
  • Crop 

Premiere Progression Blog Post 16

Audio

Now the audio. I stated in a earlier post that I kept the audio from one of the clips which was the Gold Molten Clip. I kept this audio because I really liked the music. I like how it is soft then goes more dramatic but not too dramatic that it over powers the clips. Some trailer have music that really overpowers items such as speech and background noises. I know that I can use effects which are already on the premiere to edit the volume etc, however with this audio I did not have too, which is one advantage.

So, I deleted the character falling audio and moved the Gold Molten audio next to the monologue and stretched it out so that it covered all of the clips till the last witch clip. I played this back and found that it worked really well. I especially liked it when the music started to get a bit more dramatic within the first gold clip. I thought it really worked well and when it got further into the trailer the music got even more dramatic. I quite liked it when the music was at its most dramatist was when the witch looks like she is waking up. 
Gold Molten Audio placed and stretched to cover the clips
I then watched the trailer back and found that I needed to do something about the instant change from one to another. I had a look at the Effects to see what the program had. I came across some audio transitions. These work like the video transitions but for audio. There was only three of them. I tried each one of them.

The best one that I found was Constant Power I preferred this one this one over to the others because it really made the audio not start one after another. It made the audio sound really consistent. This is because it kind of made the audio overlap each other so the second audio will be playing over the first audio. This is how it makes the audio consistent. I did not change the duration of the transition. I watched the video back and found that it was perfect; it was enough that it did not affect all of the monologue, but it was enough that it blended in the audio so it was consistent.
Audio Transition Added to the audio

Friday, 25 April 2014

Premiere Progression Blog Post 15

Gold Molten & Witch Change!

Now I have added a few more clips I have then decided to each the whole trailer back to see how it all worked out together. These clips worked really well together. However, when I watched it back I thought of an idea for the witch and the gold molten clip. This idea I thought might help the clips a little more because when watching it back I felt that they were still a little too long; but still keep the full clips. 

So, my idea was that I would split each of the clip in half and have one half after another, so, it would go gold molten clip, witch clip, gold molten clip and witch clip. I thought this would make the trailer look different and make it more effective and split the two clips up because they were quite long on their own.

To cut and split the clips I used the Razor Tool I placed the tool in the middle of each clip and then then clicked them. Once they were all cut I then used the Selection Tool to then reposition them into order as mentioned above.
Gold Molten and Witch Clips cut with the Razor Tool and in their new order.
I played back the clip from the dark forest clip and I really liked the effect it gave when when two clips were mixed together. I thought it looked really effective and it different than just having two long clips playing one after another. 

This then also brought me to another thought about the next load of action clips, that they should not be as long as clips I have previously used in the monologue. I think they should be long enough that you can see what is happening and also a transition happen between the two clips. 

Another thought that occurred to me was that I was not really adding any more drama or dramatic clips to the trailer. I am happy that I have introduced two characters to the trailer. But, at the moment my trailer does not seem to have much happening. I am not sure whether it is because I am scared to throw in loads of action clips change them around and see how it looks. Whether it is the material that I am working with or even my own personal judgement and as sort of mentioned before my confidence I am not 100% sure what it is. However, I am going to try and add a bit more drama to the second half of the trailer whether it be the clips or the audio.

Tools I have used in this post:
  • Razor Tool
  • Selection Tool

Premiere Progression Blog Post 14

Witch Clip 

I will now be adding a new clip to the trailer. This clip will go after gold molten clip. This clips will be based on the witch themselves. This clip will be good because this clip makes out like the witch is waking up from a long slumber till the main character arrives. I will be taking this dark forest clip from VTS_08_1_x264.
I made sure that the source tab was on in the viewing panel and dragged the walk-through to the viewing panel. I then used the In and Out Tool to make a mark at 00:15:54:21 and 00:16:09:08. This clip is where the witch awakens. I then dragged the clip down into the Project Clips Bin and renamed it 'Witch'.
Witch Clip in the Project Clips bin
I then dragged the clip to the timeline at the end of the end of the gold molten clip. I played back the whole video to see how it looked. I thought it looked really good and effective for the trailer.  However there were two problems with the clip, which was one) it was too long for my liking and two) the clip needed resizing and cropping. 
 
I started by separating the video and the audio, as I do not want the audio. I did this by right clicking on the clip on the timeline and went to Unlink. I then selected the audio and deleted it off the timeline till the video was the only item left of the clip. 
The clip unlinked and the audio deleted.
With this clip there was no need to crop it. This is because there was no writing which I needed to remove or cover out of site. So I just moved straight onto cutting up the clip I have. I watched the clip back on its own and found a certain part of the clip which I really liked. This part was when the witch was coming fully out of the white liquid into full view. 
Witch Clip in Resize Mode
Clip Reszied
So I played back the clip again and found the spot where I wanted to keep and remove the rest of the clip. I then selected the Razor Tool and clicked on the curser and this then cut the video into two. I then deleted the first half and kept the second half, which I then moved to next to the gold molten clip.

[image]

I thought this looked really effective, that is when I thought that this would also be a good ending clip as well. So, I decided to see how it looks with other clips around it before making a final decision whether to use this clip as an alternative ending.

Tools I have used in this post:
  • In and Out Tool
  • Unlink
  • Razor Tool

Premiere Progression Blog Post 13

Gold Molten Clip

I will now be adding another new clip to the trailer. This clip will go after the dark forest clip. This clips is based upon where a golden mirror takes shape into a demon. I thought, that I would add this clip because it looked really interesting and really different and I thought it would look really effective in the trailer. I will be taking this clip from VTS_08_01_x264.

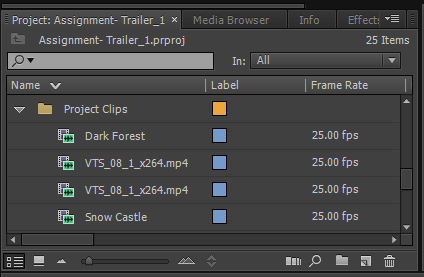
I made sure that the source tab was on in the viewing panel and dragged the walk-through to the viewing panel. I then used the In and Out Tool to make a mark at 00:11:19:04 and 00:31:16:07. This clip is where a gold forms into a demon. I then dragged the clip down into the Project Clips Bin and renamed it 'Gold Molten'.
Gold Molten clip in the Project Clips Bin
I then dragged the clip to the timeline at the end of the end of the dark forest clip. I played back the whole video to see how it looked. It looked really effective and really good.  However there were two problems with the clip, which was one) it was too long for my liking and two) the clip needed resizing and cropping. 
 
I started by separating the video and the audio. I did this by right clicking on the clip on the timeline and went to Unlink.However, this time I kept the audio. and I just placed it aside for later on in the process.
The audio and the video unlinked. Also keeping the audio for later.
I then moved onto to resizing the clip. I did this by double clicking on the clip in the clip view panel (right hand side viewing panel) till an orange lining around the clips and had little squares which I used to resize the clip. I resized the clip that the edges of the clip were touching the overall fit of the trailer.
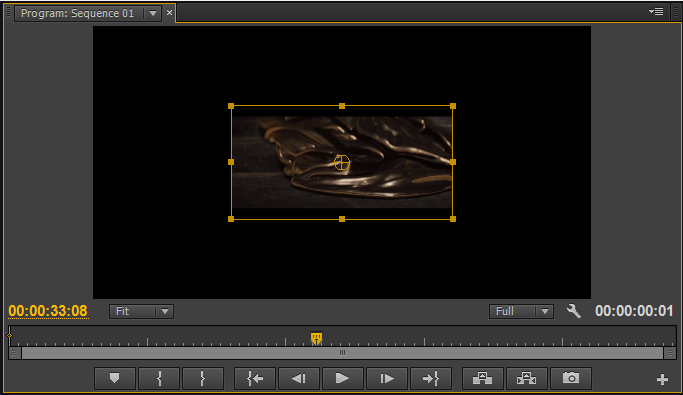
Clip in Resize Mode
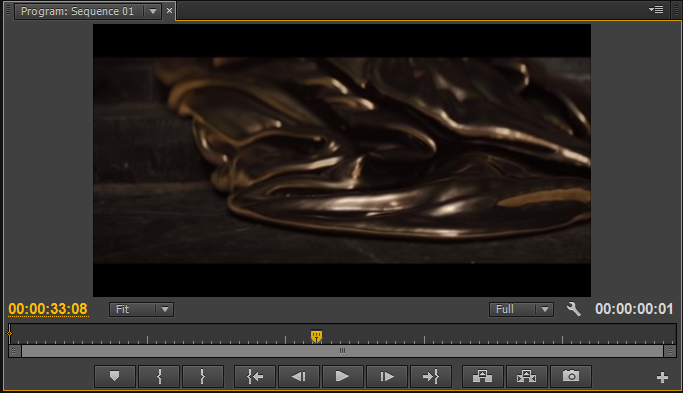
Clip resized to fit the screen
With this clip there was no need to crop it. This is because there was no writing which I needed to remove or cover out of site. So I just moved straight onto cutting up the clip I have. I watched the clip back on its own and found a certain part of the clip which I really liked. This part was when the gold is actually moving across the floor. I thought this looked more effective and full of more suspense because it kind of makes you think what is that.

So I played back the clip again and found the spot where I wanted to keep and remove the rest of the clip. I then selected the Razor Tool and clicked on the curser and this then cut the video into two. I then deleted the first half and kept the second half, which I then moved to next to the dark forest clip.

Razor Tool used to cut and split the clip into two and deleted the first half
I was not really sure what I could do to change this clip because I really liked the colour and the effects which are already placed on the video clip itself. However, I might have a play later with some effects after I have collected a few more clips.

Tools I have used in this post:
  • In and Out Tool
  • Unlink
  • Razor

Wednesday, 23 April 2014

Premiere Progression Post 12

Dark Forest Clip

I will now be adding a new clip to the trailer. This clip will go after the titles. This clips will be based on a drak forest landscape. This will be a good start to bring the action clips into the trailer, because of the darkness of the video. I will be taking this dark forest clip from VTS_08_02_x264.
I made sure that the source tab was on in the viewing panel and dragged the walk-through to the viewing panel. I then used the In and Out Tool to make a mark at 00:03:11:19 and 00:03:16:18. This clip is where a character is falling. I wanted to use this clip after the titles because I feel the dark of the clip will help bring in a little more action to the trailer. I then dragged the clip down into the Project Clips Bin and renamed it 'Dark Forest'.
Dark Forest Clip in the Project Clips Bin
I then dragged the clip to the timeline at the end of the end of the title clip. I played back the whole video to see how it looked. It worked really well after the titles, all it now needed was the transition and it would be perfect. However there were two problems with the clip, which was one) it was too long for my liking and two) the clip needed resizing and cropping. 
I started by separating the video and the audio, as I do not want the audio. I did this by right clicking on the clip on the timeline and went to Unlink. I then selected the audio and deleted it off the timeline till the video was the only item left of the clip. 
Clip unlinked and the audio deleted and the video is remaining.
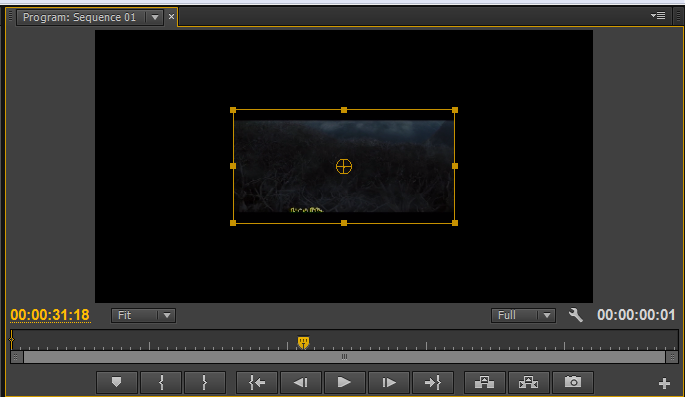
I then moved onto to resizing the clip. I did this by double clicking on the clip in the clip view panel (right hand side viewing panel) till an orange lining around the clips and had little squares which I used to resize the clip. I resized the clip that the edges of the clip were touching the overall fit of the trailer.
Clip in resize mode
Clip resized
I then went and cropped the clip. I did this by going to the Effects panel tab in the same section as the project bins and then went to Video Effects > Transform > Crop. I then went into the Effects Control panel to the crop settings. I then set the crop percentage for the bottom only because there is text on the clip which I do not want to be viewed in the trailer. So, I set the percentage for the bottom crop at 15%. This was enough to crop the writing and enough that it did not take up much of the clip up either. I then repositioned the clip so that the two black lines on the clip were even at both the top and the bottom of the clip.
Transform Effect: Crop clip cropped with the crop settings.
Clip repositioned
I am now going to be sorting out the length of the clip. I sorted this out by using the Razor Tool. I then placed the Razor Tool half way on the clip and clicked it then splits into two different clips. I then selected the second clips and deleted it.
Razor Tool used on the clip to cut it into a smaller clip.

Tools I have used in this post:
  • In and Out Tool
  • Unlink
  • Resize
  • Crop
  • Razor Tool