Overall, I am happy with the work that I have produced and the way in which this project has went underway. I feel that I have really expressed skills that I have been taught through out the module at a high levels. I am happy that I have met all of the criteria for each of the different elements of the module. The part of the project that I like the most is the Photoshop element. I feel this piece really shows a lot of creativity and I felt this really showed I interpreted a lot of skills which I have learn throughout the project and made it my own. I felt that I could have done more for both Illustrator and Premiere, however, I am happy that I have meet the criteria given within brief.
However, I feel that if I was to do this project again, then there would be certain things I would change. For instance, I felt that I did not really give much thought to the planning process of how to do this project. I was given the project and just thought, I am going to do this and I am going to do that, instead of sitting there and planning everything on pen and paper. I think if I did this I might have had a better idea on what I wanted to do a certain parts of the project, for instance the blog. I could have for instance wrote out a list of items I wanted to write about in the blog instead of starting and finding out I missed this and I missed that, which would be done last minute. I also feel that maybe I should have set myself a realistic approach when it came to actually to producing the elements itself. For example, the photoshop and the illutrator elements. I wanted to get these two elements done for week 6, however this did not happen, this is because I was writing up the blog posts at the same time, which became a bit time consuming depending on the type of blog post which I was writing up.
The unrealistic goals leads me onto the premiere side of things. I feel that I spent so much time on the blog, Photoshop and Illustrator that I did not feel that I had enough time for Premiere. After using the software I have found that it was easy to use, however, I have found that I only put the most effort into planning the first half of the trailer than the second. I think with the proper planning I felt that I would have had a little extra time doing the trailer and thought about it more carefully, as I feel (as mentioned in the trailer evaluation) that the second half of the trailer felt a little put together last minute, even thought I like it.
Monday, 5 May 2014
Premiere Progression Blog Post 38
Now I have all the clip that are required for the trailer all I need to do now is to add the transitions in between these clips. Then the trailer is complete. So, the transitions.
Transition between the Shields and Arrow Shot Clip
Transition between the Arrow Shot and Attacking Clip
For this transition between these clips I choose to use Dip to Black. I choose dip to black because I thought that it was going to look more effective. I think it worked a lot better for these clips than transitions such as Film Dissolve or Additive Dissolve. I think I used this because of the general darkness of the arrow clip itself. I think I liked the idea that because the clip is dark then I felt that I should then blacken the clip at the end to make it look more effective.
Transition
between the Attacking and Witch 2 Clip
For these transitions I have chosen to use Film Dissolve. I choose film dissolve mainly because I thought that this would look really effective between these clips. I quite like the fading of the two clips and playing on top of one another. I suppose this works with the idea which I had with the Witch 2 clip which was that It reminded me of her looking upon the battle which is commending before her. So, this transition works between these two clips for that reason.
Transition
between the Witch 2 and Escape Clip
For this part I did not use a transition. This is because at the end of the witch clip it sort does a little fade, which I really quite liked. I quite liked the idea where it played from one clip to another with a transition for the ending. I mainly did this because I was fed up of using the same transitions through out the trailer. But this was only because I was not fond of the other transitions that was available. So I left it as it was as I said I thought it was really effective and it worked quite well for the two clips.
Transition between the Escape and Ending Title Clip
For this transition between the last clip to the ending title I decided to use Dip to Black. I choose to use this transition because I thought that it would best because the ending title background is actually black. So, I thought that the dip to black would be more effective because then it would go straight to the title, initially the writing on the title would then appear.
Transition between the Shields and Arrow Shot Clip
For this transition between these two clips I choose to use Cross Dissolve. I am not really sure why I choose this transition because I think I wanted to use something different from the Film Dissolve. However, the cross dissolve and film dissolve are very similar in their own way. They both fade the clips at the start and the end of the clips. So, this was the reason why I choose this transition, because I wanted to use something different but one that is similar to Film Dissolve.
 |
| Video Transition: Dissolve : Cross Dissolve. Cross Dissolve Settings. |
Transition between the Arrow Shot and Attacking Clip
For this transition between these clips I choose to use Dip to Black. I choose dip to black because I thought that it was going to look more effective. I think it worked a lot better for these clips than transitions such as Film Dissolve or Additive Dissolve. I think I used this because of the general darkness of the arrow clip itself. I think I liked the idea that because the clip is dark then I felt that I should then blacken the clip at the end to make it look more effective.
 |
| Video Transitions: Dissolve: Dip to Black. Dip to Black Settings |
For these transitions I have chosen to use Film Dissolve. I choose film dissolve mainly because I thought that this would look really effective between these clips. I quite like the fading of the two clips and playing on top of one another. I suppose this works with the idea which I had with the Witch 2 clip which was that It reminded me of her looking upon the battle which is commending before her. So, this transition works between these two clips for that reason.
 |
| Video Transition: Dissolve : Film Dissolve. Film Dissolve Settings. |
For this part I did not use a transition. This is because at the end of the witch clip it sort does a little fade, which I really quite liked. I quite liked the idea where it played from one clip to another with a transition for the ending. I mainly did this because I was fed up of using the same transitions through out the trailer. But this was only because I was not fond of the other transitions that was available. So I left it as it was as I said I thought it was really effective and it worked quite well for the two clips.
Transition between the Escape and Ending Title Clip
For this transition between the last clip to the ending title I decided to use Dip to Black. I choose to use this transition because I thought that it would best because the ending title background is actually black. So, I thought that the dip to black would be more effective because then it would go straight to the title, initially the writing on the title would then appear.
 |
| Video Transition: Dissolve : Dip to Black. Dip to Black Settings. |
Premiere Progression Blog Post 26
Water Flowing Clip
I will now be adding a new clip to the
trailer. This clip will go after the birds and witch clip.
This clip is based on the main character getting hit with a body of water. I thought this clip would look and work really well in the trailer. Again I am not really sure why I choose this clip to use, I suppose it is because I feel that I have not used many sources from this video which I have got a hold of. I also think that I like this clip because I like the way the whole water comes and hits the main character and it makes you think, what did they do to survive that bit of water. I will be
taking this water from the Tombraider Walkthrough.
I made sure that the source tab was on in the viewing panel and dragged the walk-through to the viewing panel. I then used the In and Out Tool to
make a mark at 00:00:00:00 and 00:00:00:00. This clip is where shards
of glass fall onto the floor. I then dragged the clip down into the Project Clips Bin and renamed it 'Water Flowing'.
 |
| Water Flowing clip in Project Clip Bin |
 |
| Water Following Clip Unlinked and the Audio Delete |
So, I have decided to try to resize the
clip so that there are two black lines which will match with the
previous clips by double clicking on the clip in the view panel on the
right hand side of the screen. However, this did not work very well,
because I resized the clip with a corner square, then tried to widen it
with a square on the right hand side, and it just resized it in the
wrong way. So, My only option at the moment is to crop it.
I used the crop and it worked out
loads better than I anticipated. I thought that I would be loosing a lot
of the video clip from both the top and the bottom, however I did not.
Which was a big relief, otherwise I would have had to go back and resize
all of the clips, meaning that I could loose quality and become
pixelated.
To get to the crop I went to the Effects Panel > Video Effects > Transform > Crop. I then selected the clip and then clicked on Effects Control. I
changed the crop percentages for both the top and the bottom only. This
is because I still wanted the width to be the same size as the fit, but
I wanted to cut some off the top and the bottom on that it matched the
previous clips [as mentioned above]. I only went with 20% because it was
enough that it looked like the other clips, but also enough that a lot
of the clip is still in tack and that you can still see everything that
happens.
 |
| Video Effects: Transform: Crop. Crop Settings |
Tools I have used in this post:
- In and Out Tool
- Unlinked
- Crop
Premiere Progression Blog Post 37
Witch 3 Clip
I will now be adding a new clip to
the
trailer. This clip will go on top of the Carrying Clip. I decided to have this clip on top of the carrying clip because I felt that this clip would look effective. It kind makes me think that the witch is watching over her death. . I
will be
taking this Witch clip from VTS_08_04_X264.
I made sure that the source tab was on in the viewing panel and dragged the walk-through to the viewing panel. I then used the In and Out Tool to
make a mark at 00:45:06:23 and 00:45:07:10. I then dragged the clip down into the Project Clips Bin and renamed it 'Witch 3'.
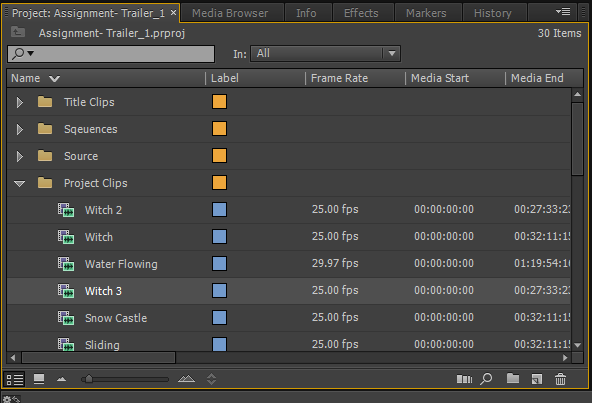 |
| Witch 3 Clip in the Project Clips Bin |
I then dragged the clip to the timeline at the end of the end of the music. The
only problem with the clip was the writing on the clip which needed to
be removed.
So, I started by separating the video and
the audio, however, this time I kept the audio. I did this by right
clicking on the clip on the timeline and went to Unlink. I then
selected the audio and deleted it because I did not want the audio as I
was going to be using different audio music for it.
 |
| Witch 3 Clip Unlinked and audio deleted |
I then moved onto to resizing the clip. I
did this by double clicking on the clip in the clip view panel (right
hand side viewing panel) till an orange lining around the clips and had
little squares which I used to resize the clip. I resized the clip that
the edges of the clip were touching the overall fit of the trailer.
 |
| Witch 3 in Resize Mode |
Here are the results.
 |
| Clip resized |
I then went and cropped the clip. I did this by going to the Effects panel tab in the same section as the project bins and then went to Video Effects > Transform > Crop. I then went into the Effects Control panel
to the crop settings. I then set the crop percentage for the bottom
only because there is text on the clip which I do not want to be viewed
in the trailer. So, I set the percentage for the bottom crop at 21%.
This was enough to crop the writing and enough that it did not take up
much of the clip up either. I then repositioned the clip so that the two
black lines on the clip were even at both the top and the bottom of the
clip.
 |
| Video Effect: Transform: Crop. Crop Settings. |
Here are the final results.
 |
| Clip repositioned |
For this effect to come into effect where one clip is playing on top of another, I have to change the opacity of the witch clip. The opacity make the clip fade, enough that you are still able to see the clip you are able to place it on top of another clip. I change this clips opacity percentage to 30%, I changed it to 30% because the carrying clip is quite bright as a clip, and this witch clip is quite dark because of the castle structure. So, making it 30% allows the clip to still be seen, but I did not want it so that it is really visable like previous times, but enough that you can see it.
 |
| Opacity Percentage changed for Witch 3 Clip |
Tools I have used in this post:
- In and Out tool
- Unlink
- Resize
- Crop
- Opacity
Premiere Progression Blog Post 36
Escape Clip
I will now be adding a new clip to the
trailer. This clip will go after the Witch 2 clip. I choose this clip because I quite liked the idea as this clip as the ending. I know over the course of the creating the trailer that I have kept changing my mind about the ending. However, I am happy with this as my ending because I like the way she looks like she is escaping from something. I think it made the ending more dramatic now I am not longer using the jumping clip. I
will be
taking this Escape clip from Tombraider Walkthrough.
I made sure that the source tab was on in the viewing panel and dragged the walk-through to the viewing panel. I then used the In and Out Tool to
make a mark at 00:10:38:22 and 00:10:48:22. This clip is where shards
of glass fall onto the floor. I then dragged the clip down into the Project Clips Bin and renamed it 'Escape'.
 |
| Escape Clip in the Project Clips Bin |
I then dragged the clip to the timeline at the end of the end of the music. The
only problem with the clip was the writing on the clip which needed to
be removed.
So, I started by separating the video and
the audio, however, this time I kept the audio. I did this by right
clicking on the clip on the timeline and went to Unlink. I then
selected the audio and deleted it because I did not want the audio as I
was going to be using different audio music for it.
 |
| Escape clip unlinked and audio deleted. |
So, I have decided to try to resize the
clip so that there are two black lines which will match with the
previous clips by double clicking on the clip in the view panel on the
right hand side of the screen. However, this did not work very well,
because I resized the clip with a corner square, then tried to widen it
with a square on the right hand side, and it just resized it in the
wrong way. So, My only option at the moment is to crop it.
I used the crop and it worked out
loads better than I anticipated. I thought that I would be loosing a lot
of the video clip from both the top and the bottom, however I did not.
Which was a big relief, otherwise I would have had to go back and resize
all of the clips, meaning that I could loose quality and become
pixelated.
To get to the crop I went to the Effects Panel > Video Effects > Transform > Crop. I then selected the clip and then clicked on Effects Control. I
changed the crop percentages for both the top and the bottom only. This
is because I still wanted the width to be the same size as the fit, but
I wanted to cut some off the top and the bottom on that it matched the
previous clips [as mentioned above]. I only went with 20% because it was
enough that it looked like the other clips, but also enough that a lot
of the clip is still in tack and that you can still see everything that
happens.
 |
| Video Effect: Transform: Crop. Crop Settings. |
I wanted to make sure that I had enough to fit within the gap that is left within the trailer. The reason why I got the got the whole clip was because I was not sure what part of this clip I actually wanted. So, I played through the clip till I found the pet of the clip I wanted. The part which I had choose was the part where the main character looks they have just escaped a chase within some caves. I thought this was really effective ending it kind of makes you think what is happening here, are they escaping from something!? To cut this clip I used the Razor Tool I just placed it where I wanted to cut the clip and clicked and it cut the clip. I then deleted the other half of the clip and moved the remaining clip into the gap. Lucky enough it actually fitted within the gap.
 |
| Razor Tool used to Cut the Clip |
Tools I have used in this post:
- In and Out tool
- Unlink
- Resize
- Crop
- Razor Tool
Premiere Progression Post 35
Witch 2 Clip
I will now be adding a new clip to the
trailer. This clip will go after the Attacking Shot clip. This clip will be after the attacking clip. I choose this clip because it looks like the witch is watching everything happen almost by the facial head movement. I am not really sure why I choose this clip, I know I mentioned before why, but to be honest I am not really sure. I was not really sure what kind of clip I actually wanted between the attack and the final clip I have in mind. However, I feel that it works I am not sure how, but it does. I
will be
taking this Attacking clip from VTS_08_4_x264.
I made sure that the source tab was on in the viewing panel and dragged the walk-through to the viewing panel. I then used the In and Out Tool to
make a mark at 00:11:24:21 and 00:11:26:02. . I then dragged the clip down into the Project Clips Bin and renamed it 'Witch 2'.
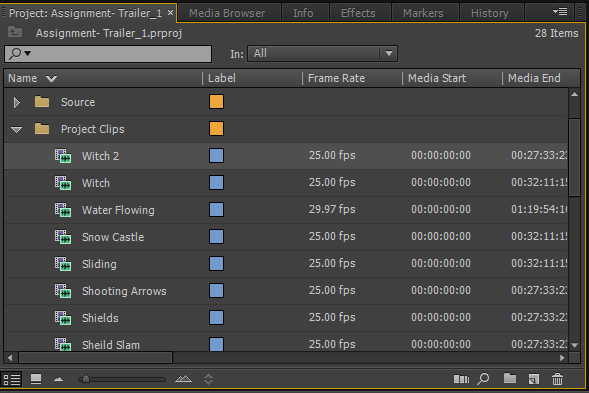 |
| Witch 2 Clip in the Project Clips Bin |
So, I started by separating the video and
the audio, however, this time I kept the audio. I did this by right
clicking on the clip on the timeline and went to Unlink. I then
selected the audio and deleted it because I did not want the audio as I
was going to be using different audio music for it.
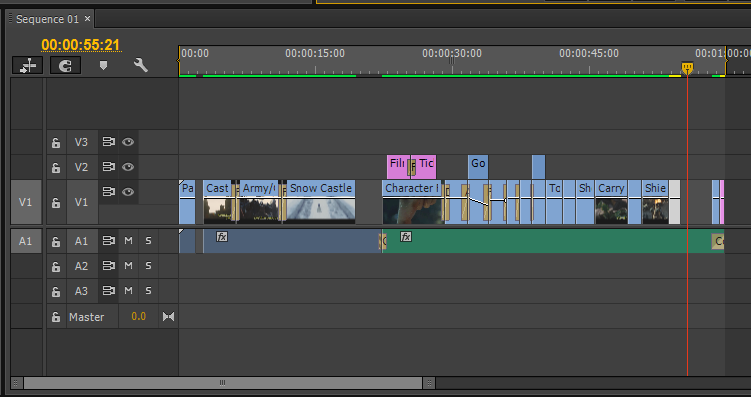 |
| Witch 2 Clip Unlinked and audio deleted |
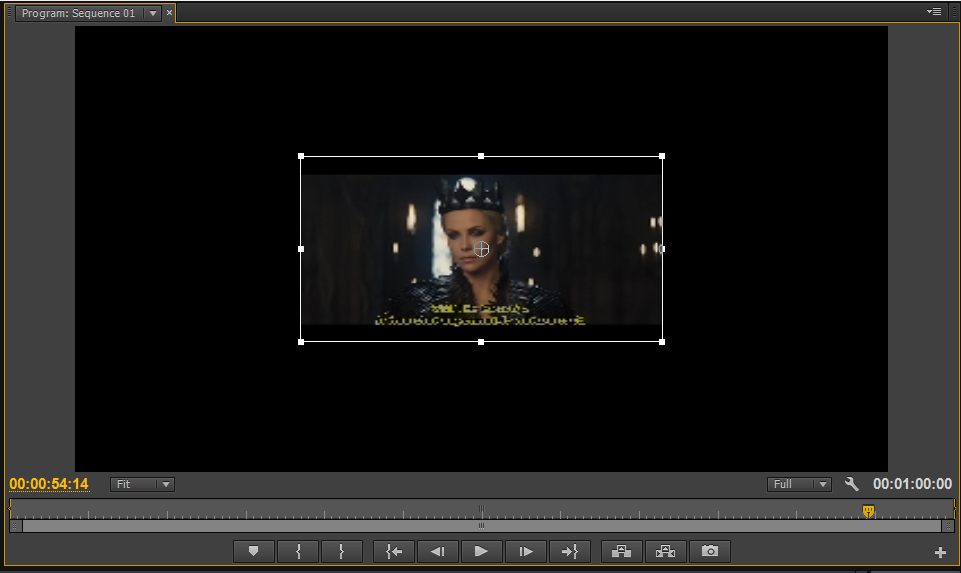 |
| Clip in resize mode |
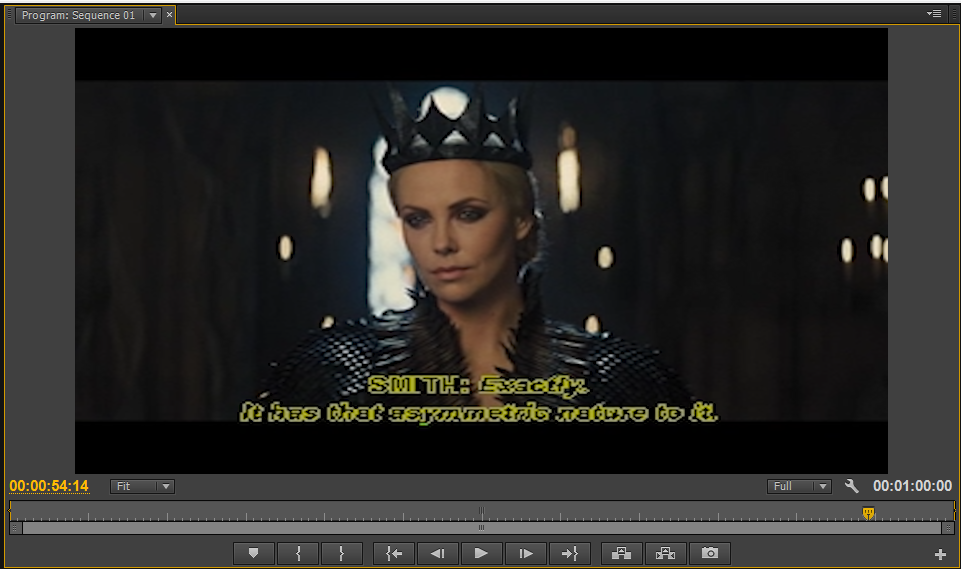 |
| Clip Resized |
 |
| Video Effect: Transform: Crop. Crop Settings. |
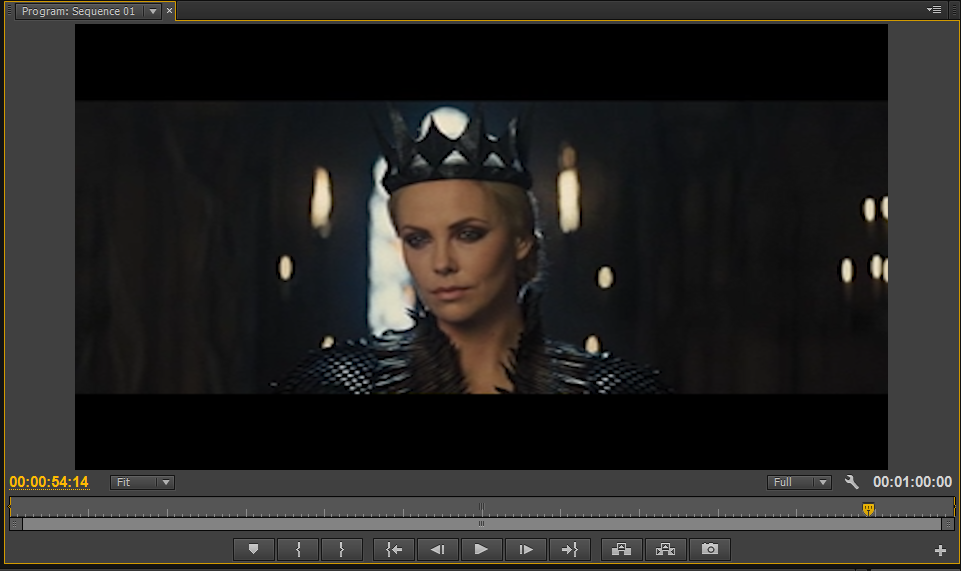 |
| Clip Repositioned |
Tools I have used in this post:
- In and Out tool
- Unlink
- Resize
- Crop
Premiere Progression Blog Post 34
Attacking Clip
I will now be adding a new clip to the
trailer. This clip will go after the Arrow Shot clip. As I mentioned before in my previous post that this clip will work after the arrow shot clip. I really like this clip because you get a view of both views when it comes to the fight. For instance you see the enemy coming towards the hero trying to attack, but got to the hero view of attacking the enemy. I
will be
taking this Attacking clip from VTS_08_4_x264.
I made sure that the source tab was on in the viewing panel and dragged the walk-through to the viewing panel. I then used the In and Out Tool to
make a mark at 00:08:49:22 and 00:08:52:00. This clip is where shards
of glass fall onto the floor. I then dragged the clip down into the Project Clips Bin and renamed it 'Attacking Clip'.
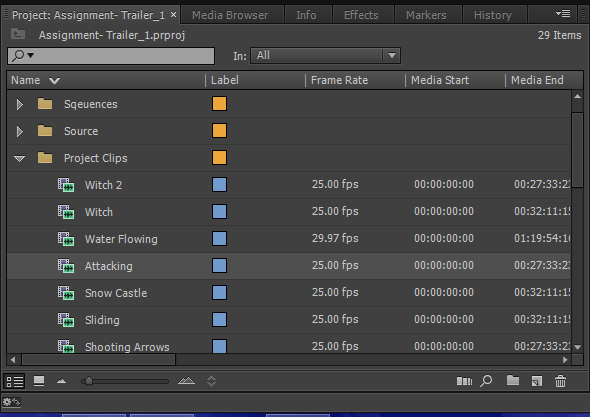 |
| Attacking Clip in the Project Clips Bin |
So, I started by separating the video and
the audio, however, this time I kept the audio. I did this by right
clicking on the clip on the timeline and went to Unlink. I then
selected the audio and deleted it because I did not want the audio as I
was going to be using different audio music for it.
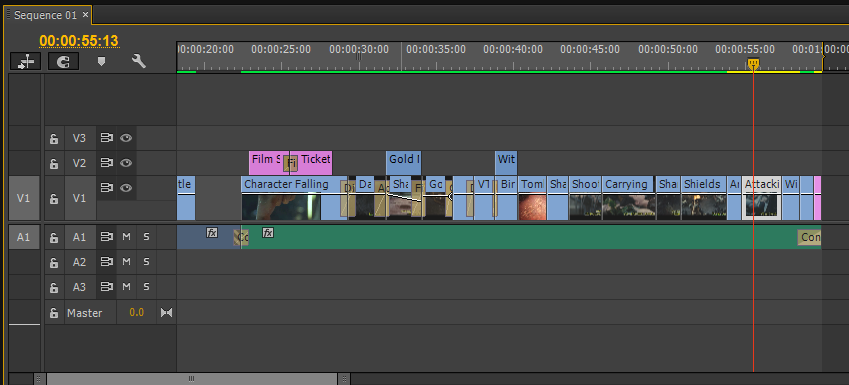 |
| Attacking Clip Unlinked and audio deleted |
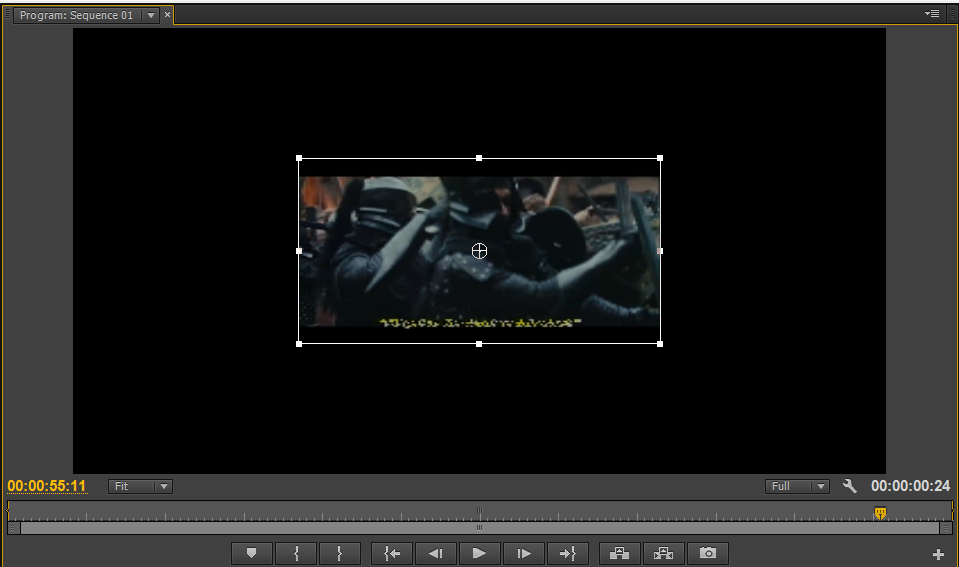 |
| Clip in Resize Mode |
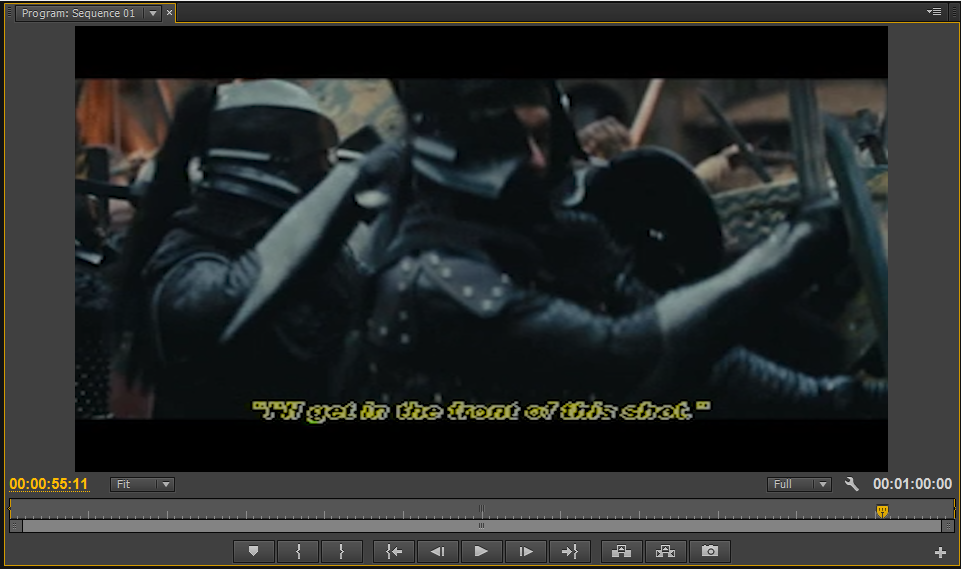 |
| Clip resized |
 |
| Video Effect: Transform: Crop. Crop Settings. |
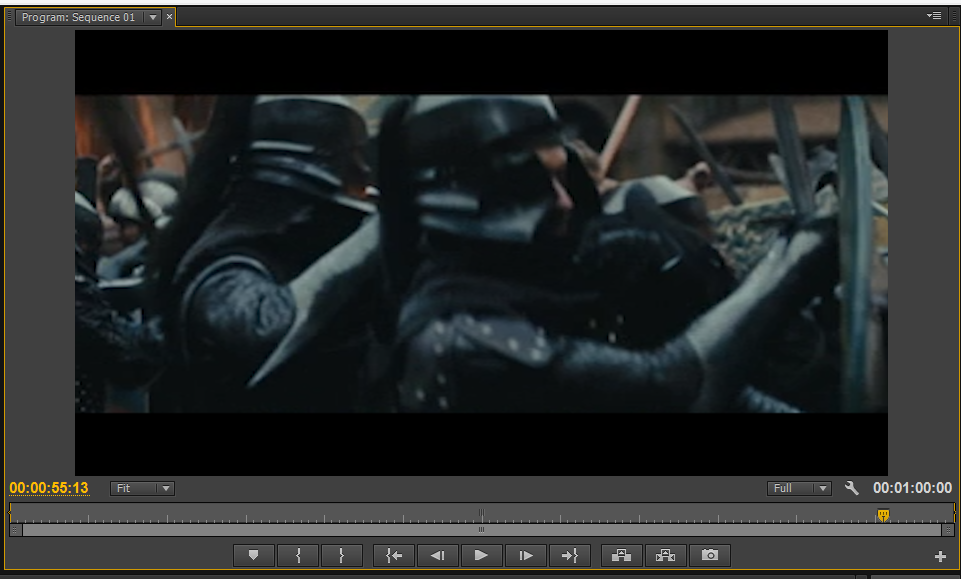 |
| Clip Repositioned |
- In and Out tool
- Unlink
- Resize
- Crop
Sunday, 4 May 2014
Premiere Progression Blog Post 33
Arrow Shot Clip
I will now be adding a new clip to the
trailer. This clip will go after the Shields Clip. This clip is based on the main character. originally this clip was after the shooting arrow clip, but some reason I did not place it back there and by that time I sorted all my transitions out I thought it was best not to mess with it a lot. However, I did use this clip after the shield clip. I mainly used this clip because there were not many clips of the main character. I also found this clips really effective because it is based on the main character being attacked themselves. Though this clip does look quite effective after the shields because after this clip there will be another fight clip, so I guess that is a bonus. I
will be
taking this Arrow Shot clip from Tombraider Walkthough.
I made sure that the source tab was on in the viewing panel and dragged the walk-through to the viewing panel. I then used the In and Out Tool to
make a mark at 00:45:06:23 and 00:45:07:10. This clip is where shards
of glass fall onto the floor. I then dragged the clip down into the Project Clips Bin and renamed it 'Arrow Shot'.
 |
| Arrow Shot Clip in the Project Clips Folder |
I then dragged the clip to the timeline at the end of the end of the music. The
only problem with the clip was the writing on the clip which needed to
be removed.
So, I started by separating the video and
the audio, however, this time I kept the audio. I did this by right
clicking on the clip on the timeline and went to Unlink. I then
selected the audio and deleted it because I did not want the audio as I
was going to be using different audio music for it.
 |
| Arrow Shot Clip Unlinked and the Audio Deleted |
I used the crop and it worked out
loads better than I anticipated. I thought that I would be loosing a lot
of the video clip from both the top and the bottom, however I did not.
Which was a big relief, otherwise I would have had to go back and resize
all of the clips, meaning that I could loose quality and become
pixelated.
To get to the crop I went to the Effects Panel > Video Effects > Transform > Crop. I then selected the clip and then clicked on Effects Control. I
changed the crop percentages for both the top and the bottom only. This
is because I still wanted the width to be the same size as the fit, but
I wanted to cut some off the top and the bottom on that it matched the
previous clips [as mentioned above]. I only went with 20% because it was
enough that it looked like the other clips, but also enough that a lot
of the clip is still in tack and that you can still see everything that
happens.
 |
| Video Effect: Transform: Crop. Crop Settings |
Tools I have used in this post:
- In and Out tool
- Unlink
- Resize
- Crop
Subscribe to:
Comments (Atom)